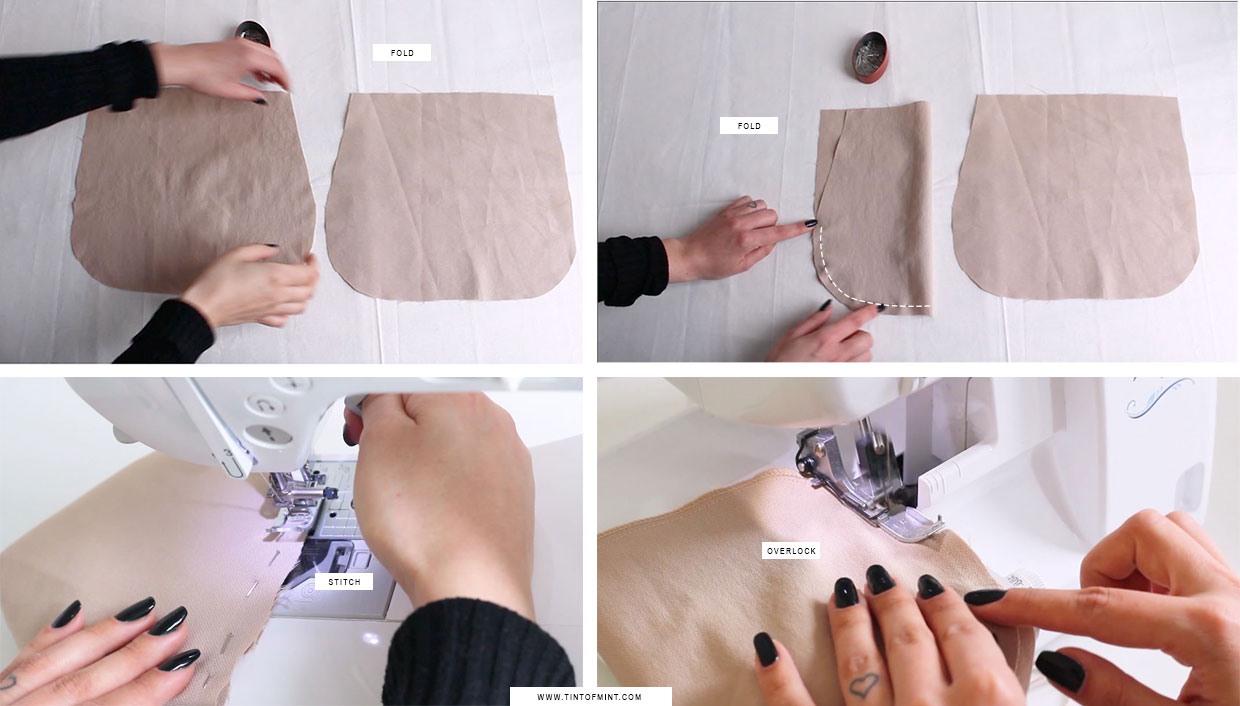
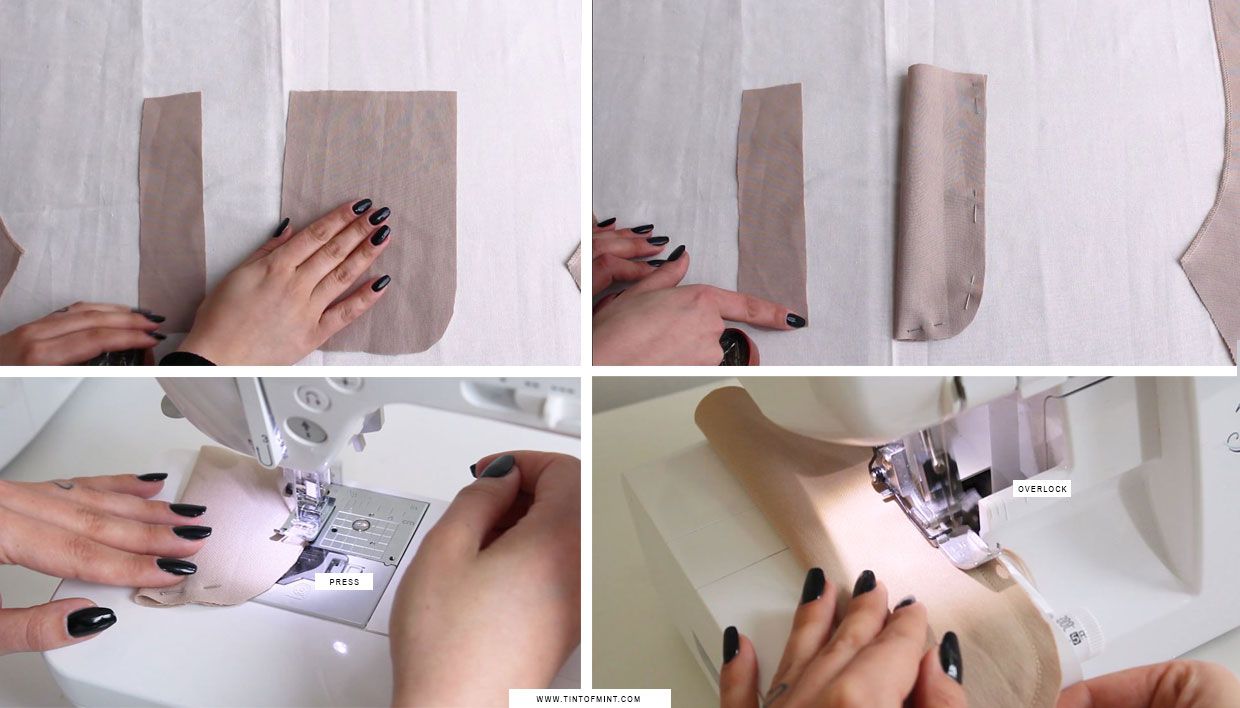
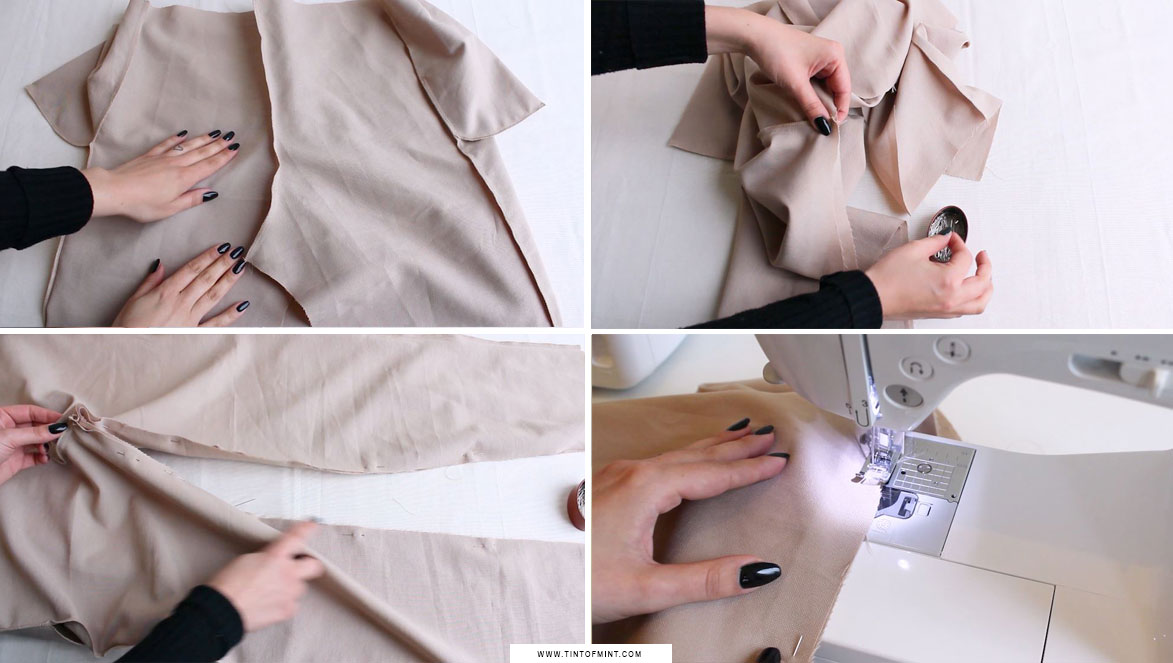
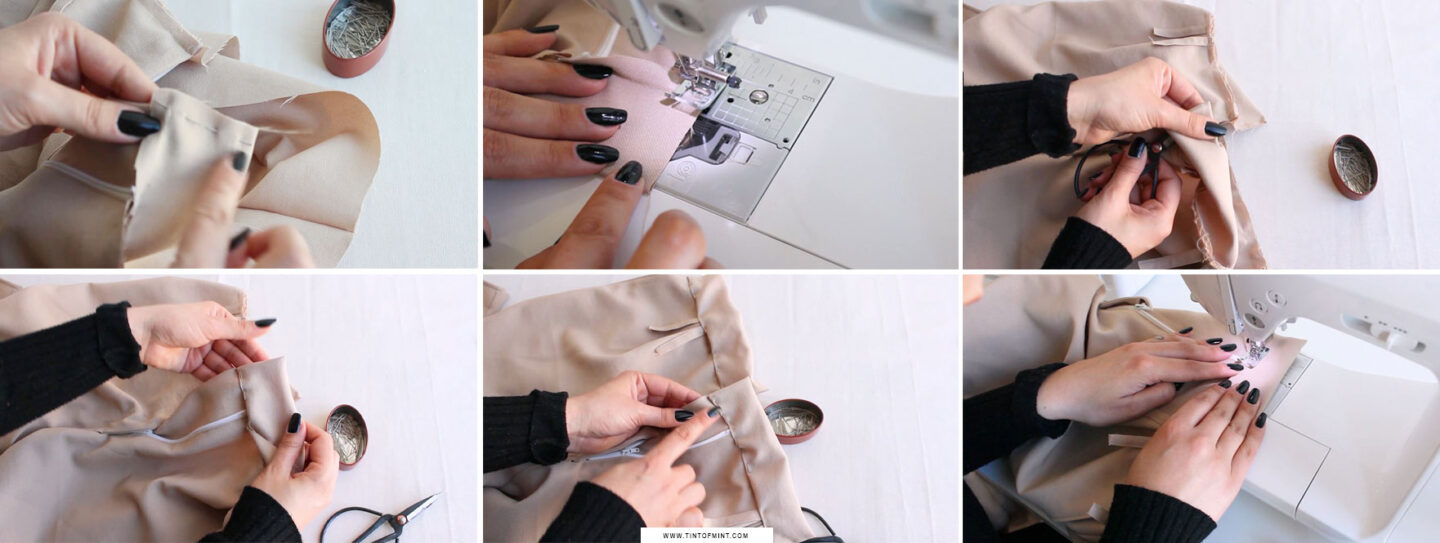
Starting from the pockets. Take a pocket piece, fold it in half and pin the bottom part as highlighted on the image. Then stitch and overlock that edge.
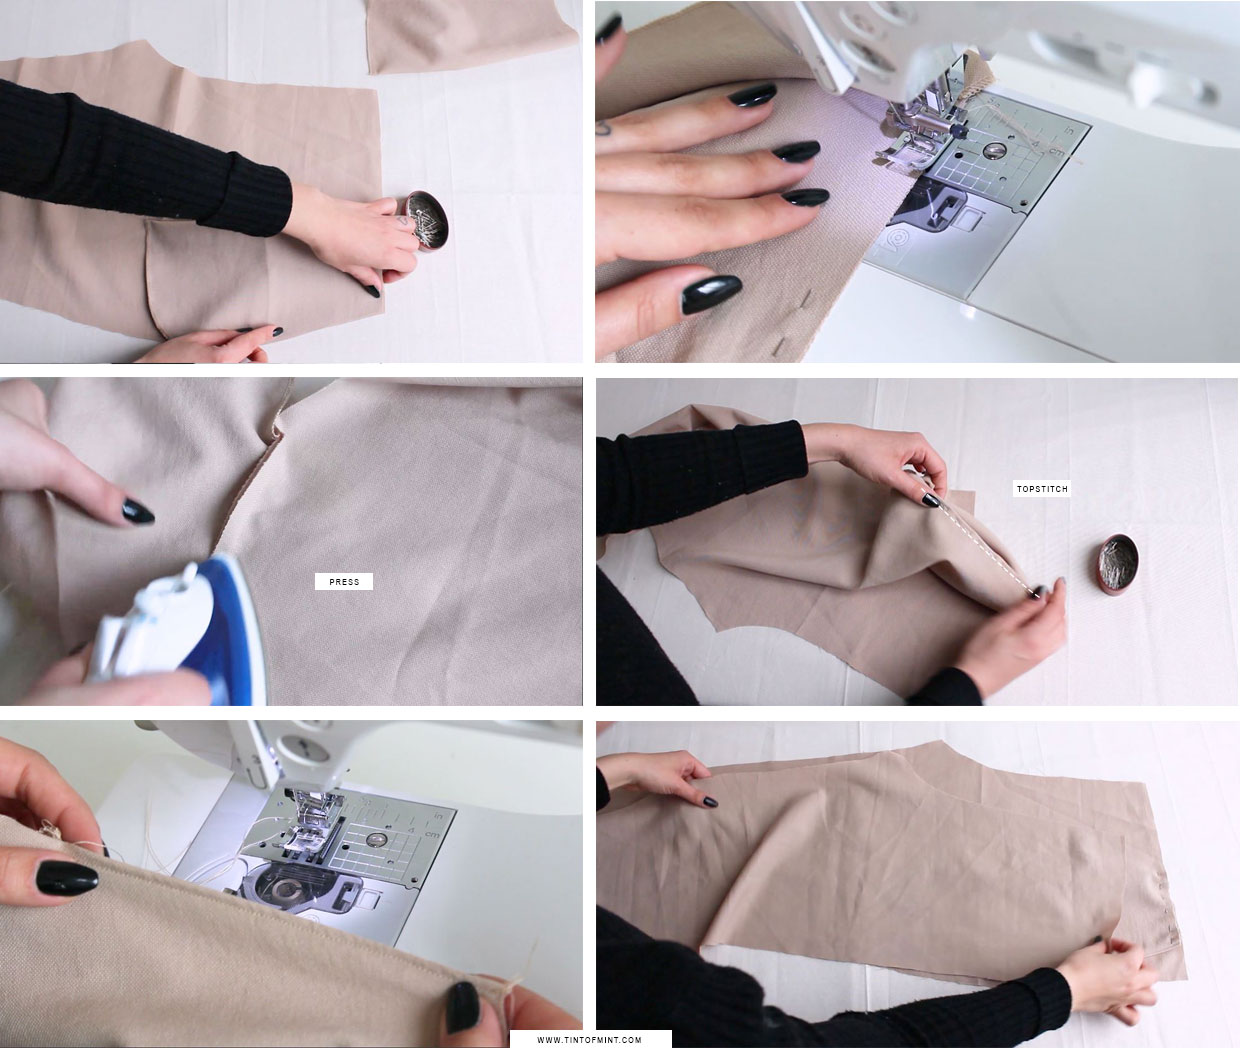
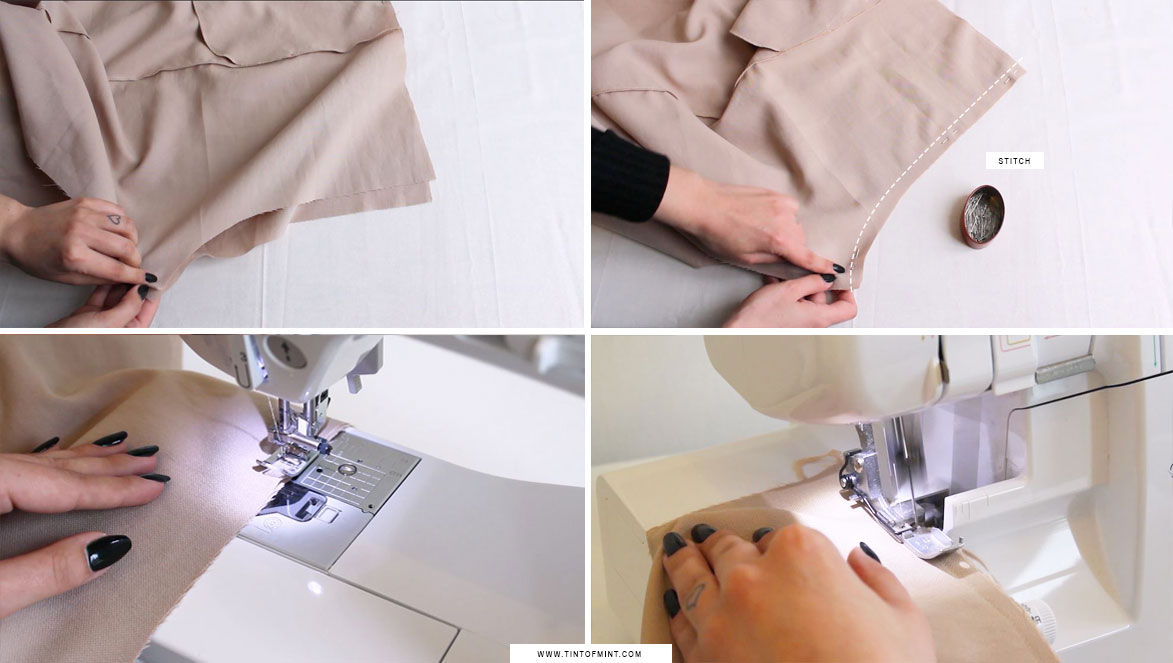
Place the pocket on the front trouser panel and pin together edges that have been cut on the angle. Stitch and then press the seam. Next, topstitch the pocket’s edge by approx. 4mm. Join front and back trouser sides together.
Stitch and overlock the trouser side seams and press. Overlock the centre front edges of the front pieces.
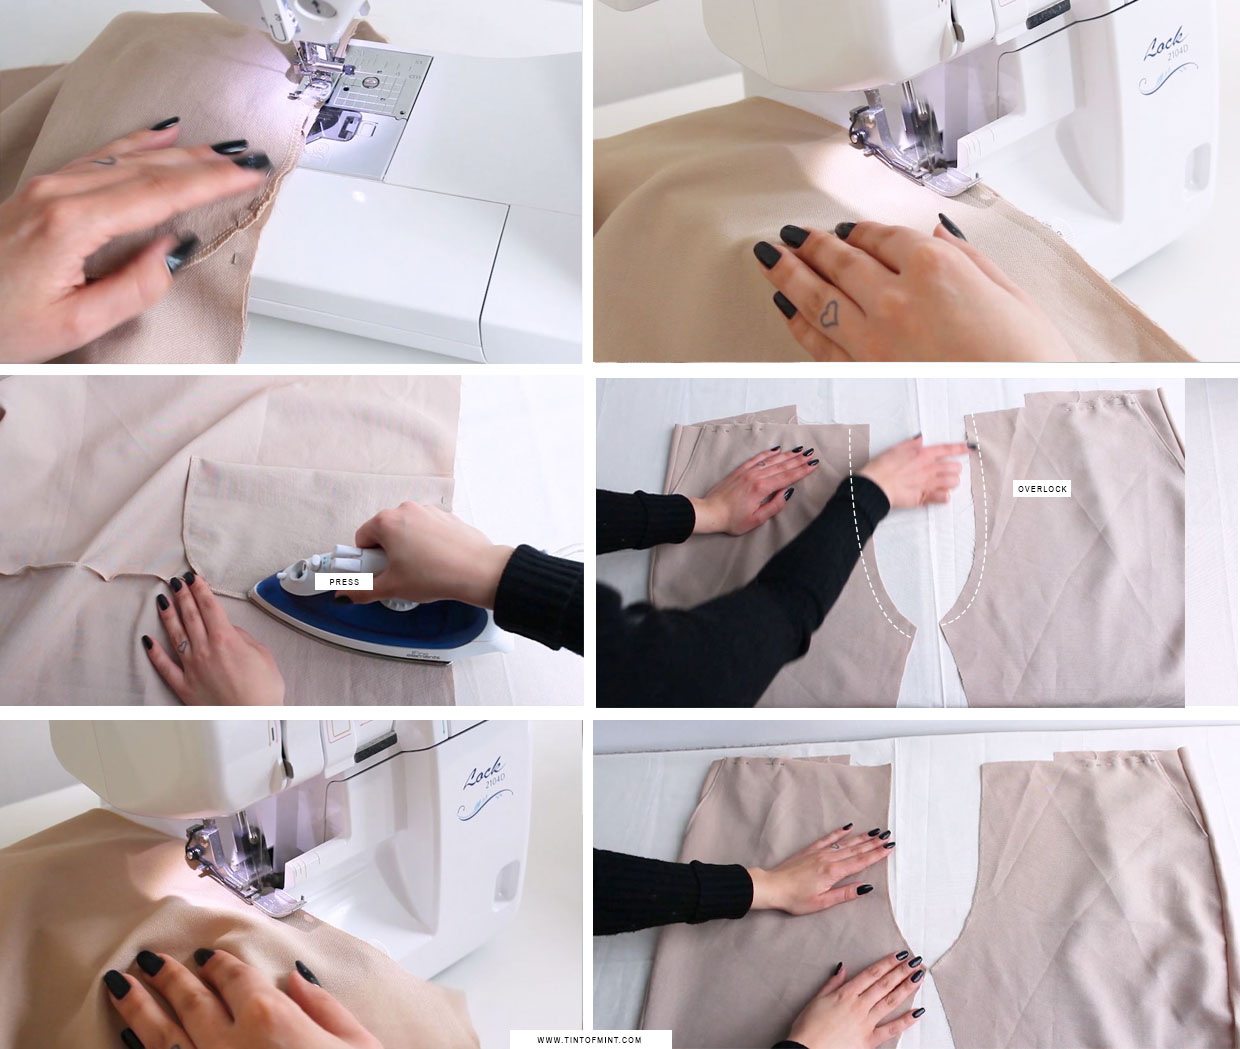
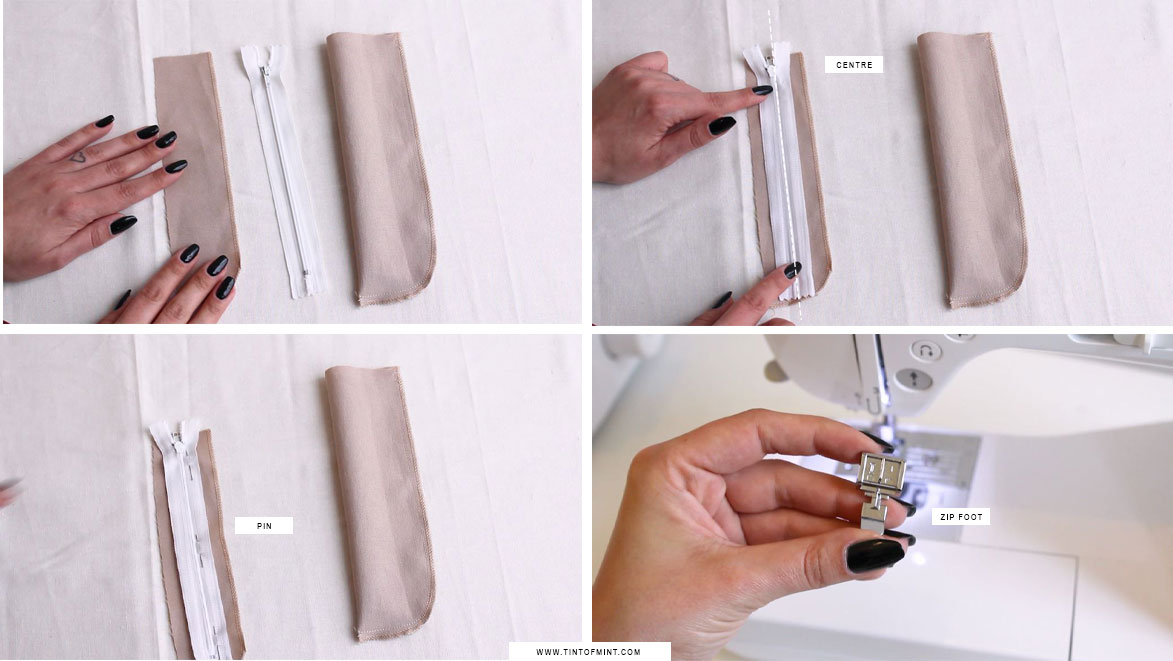
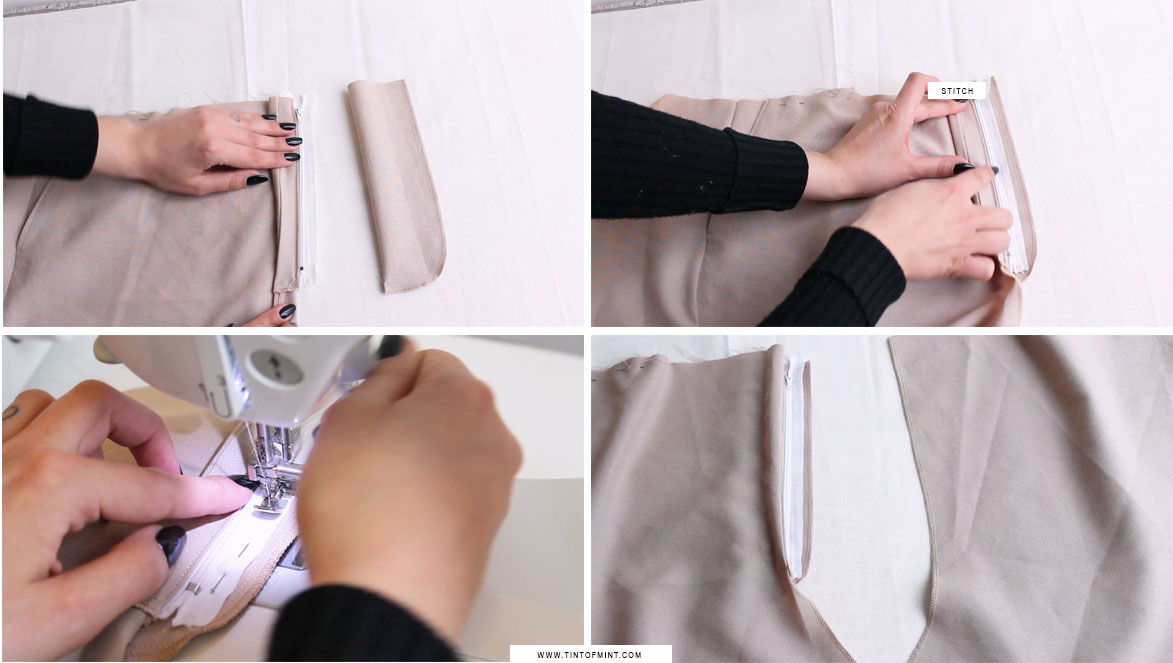
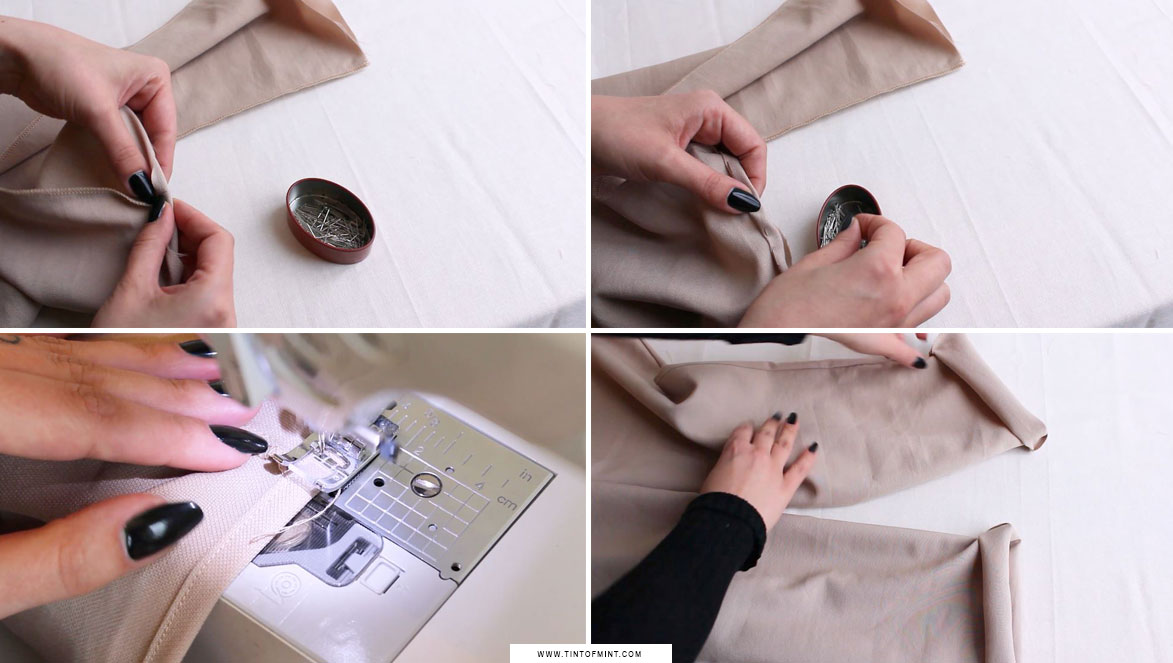
Moving on to the zipper, take a fly facing and fold it in half. Then stitch and overlock the edge. Also, overlock the edge of the zip fly shield.
Take the zip and place it in the middle of the fly shield facing. Approximately 1cm away from each edge and 1cm down. Change to the zipper foot and stitch the zip.
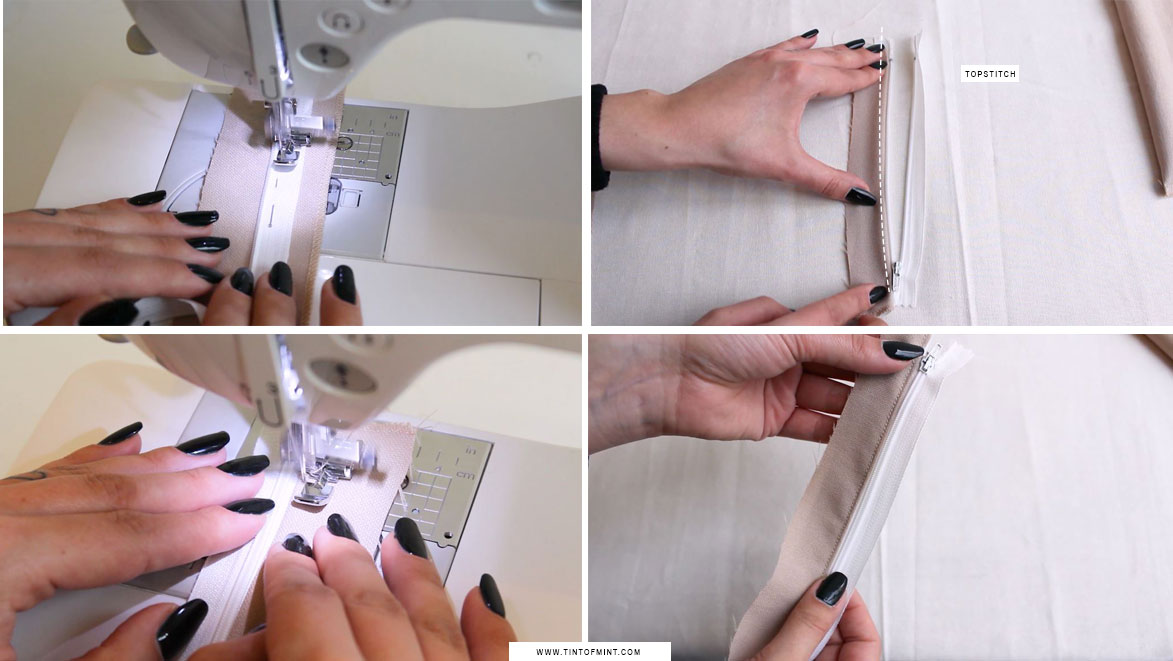
Then fold the fly facing and topstitch the edge.
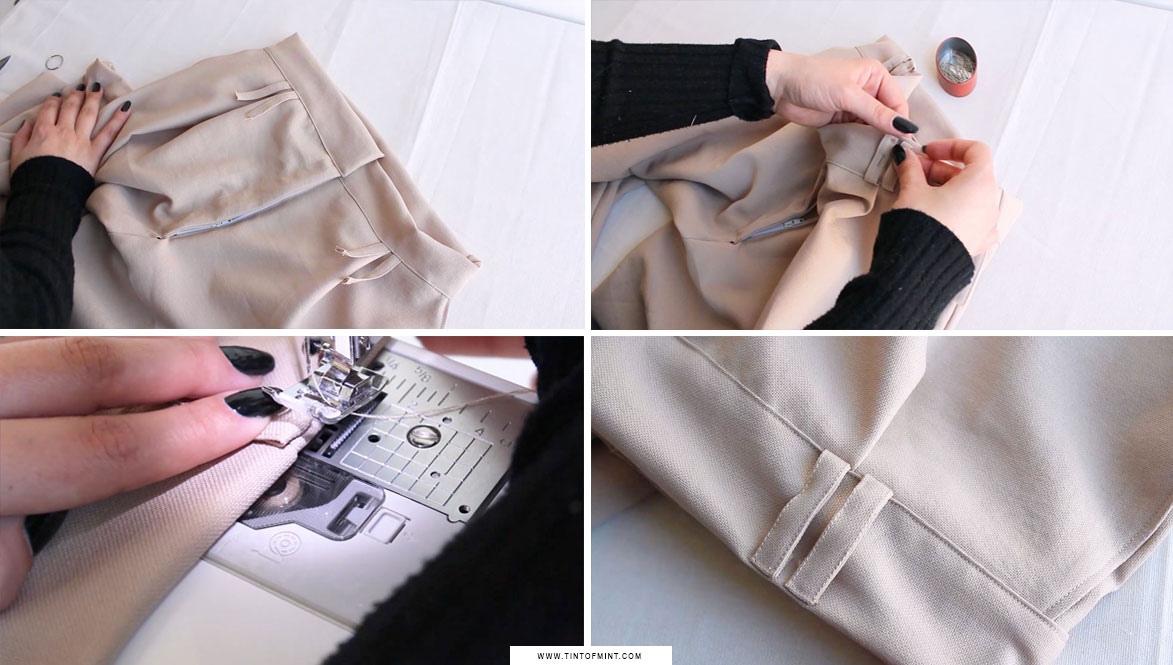
Next, pin and sew the raw edge of the fly facing to the front right trouser panel and press the seam open. Then fold the fly shield, secure it with pins and topstitch. Make sure to stop stitching when you get to the centre of the zip and do not stitch the order side of the zip as we’ll need it in the next step.
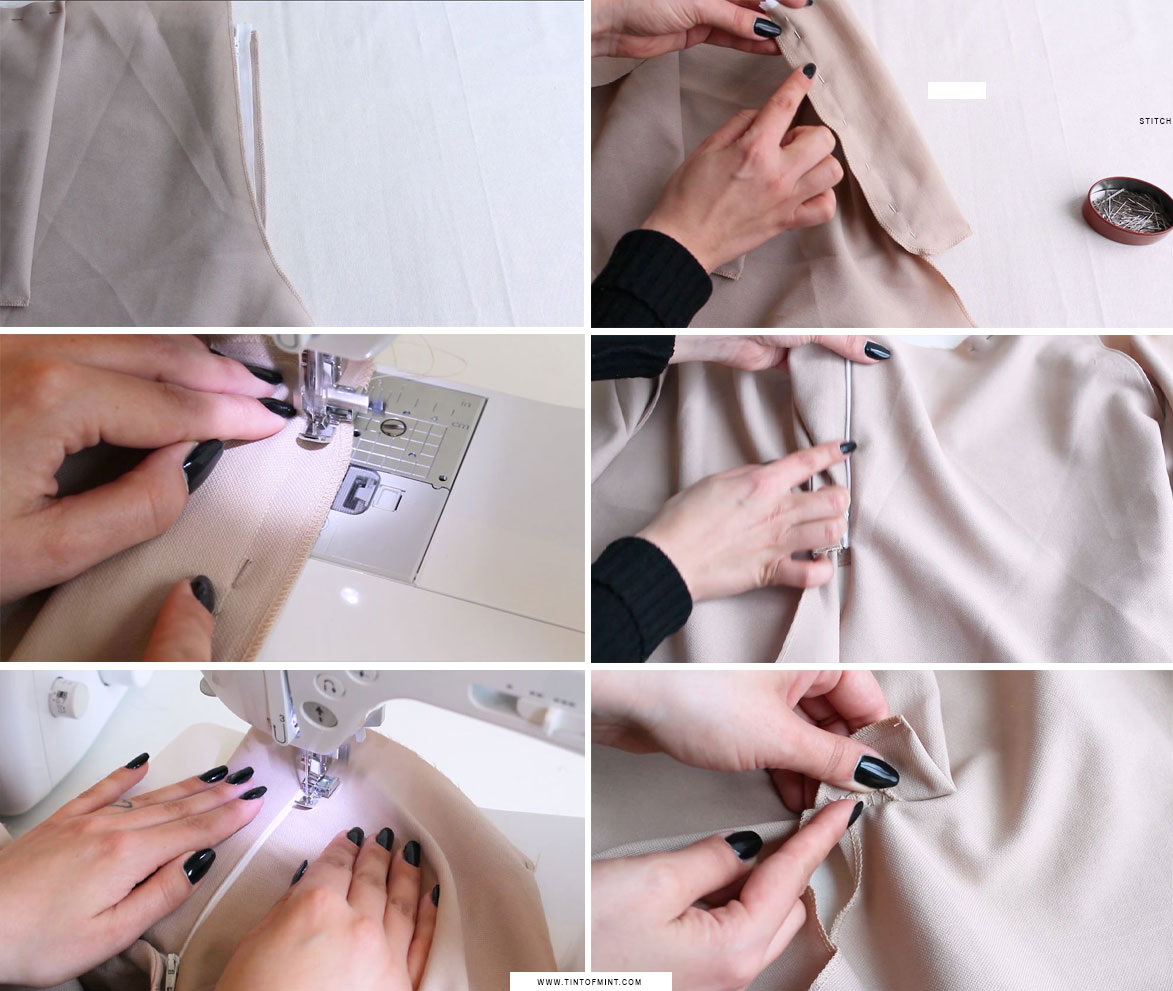
Place the other side of the zipper on a zip facing approximately 1 cm away from the edge and also 1cm down and stitch using the zip foot.
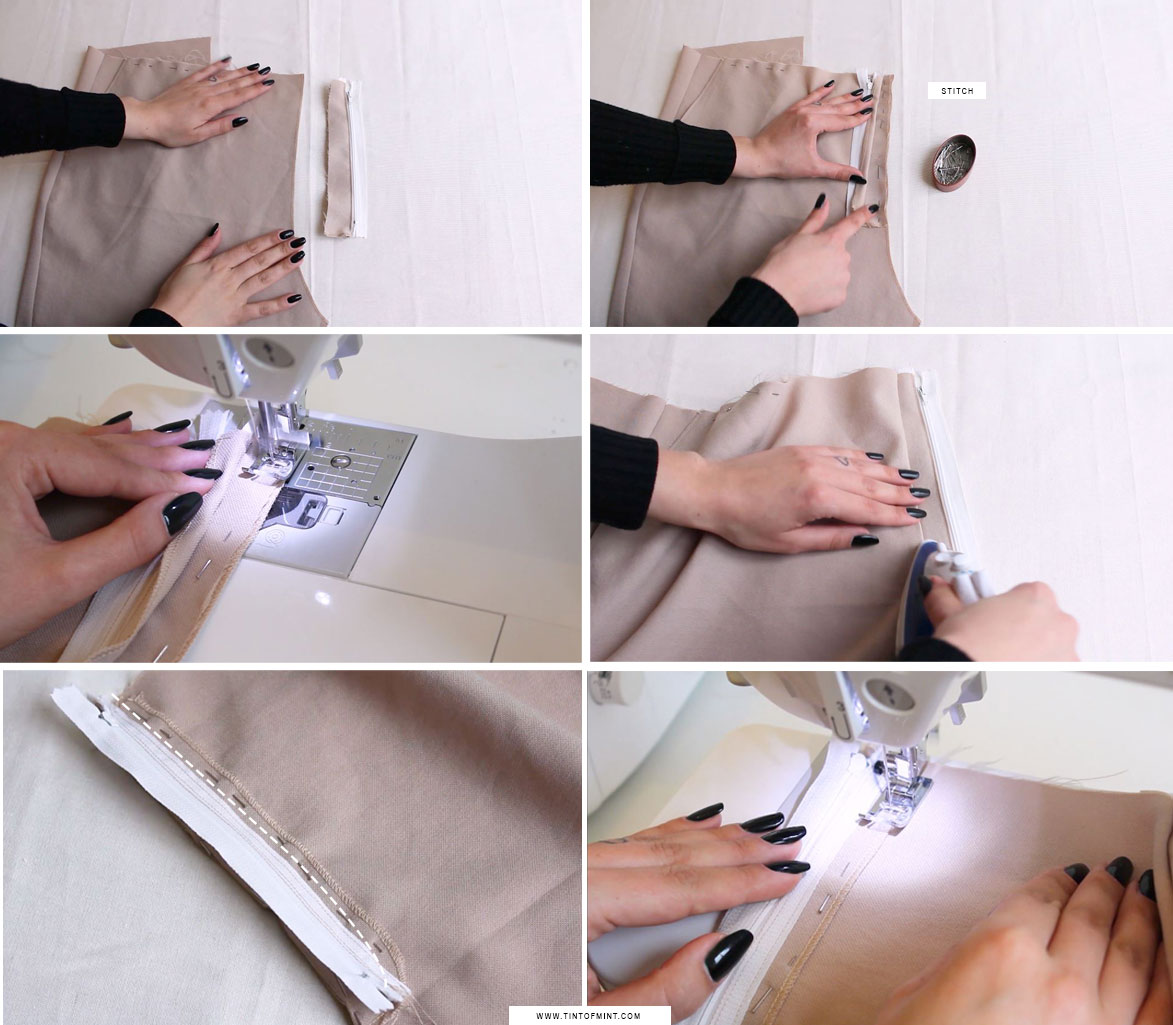
Then take the left front panel and attach it to the zip facing. When you pin it make sure that the panel will cover up the zip completely. Stitch on the other side of the zip facing as it’s easier to follow the previous stitch line for better accuracy. Then on the right side of the fabric topstitch the edge close to the zipper. You can then secure zip in place with a small back tack stitch at the bottom.
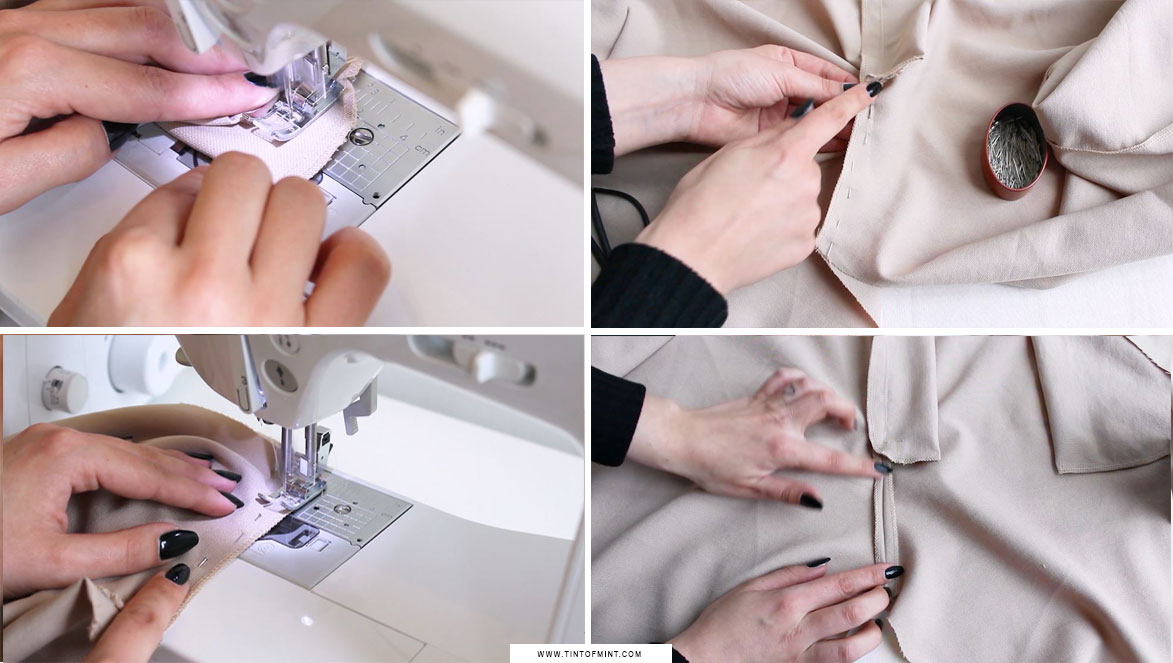
To finish off the front, pin and sew the rest of the two panels together and press the seam open.
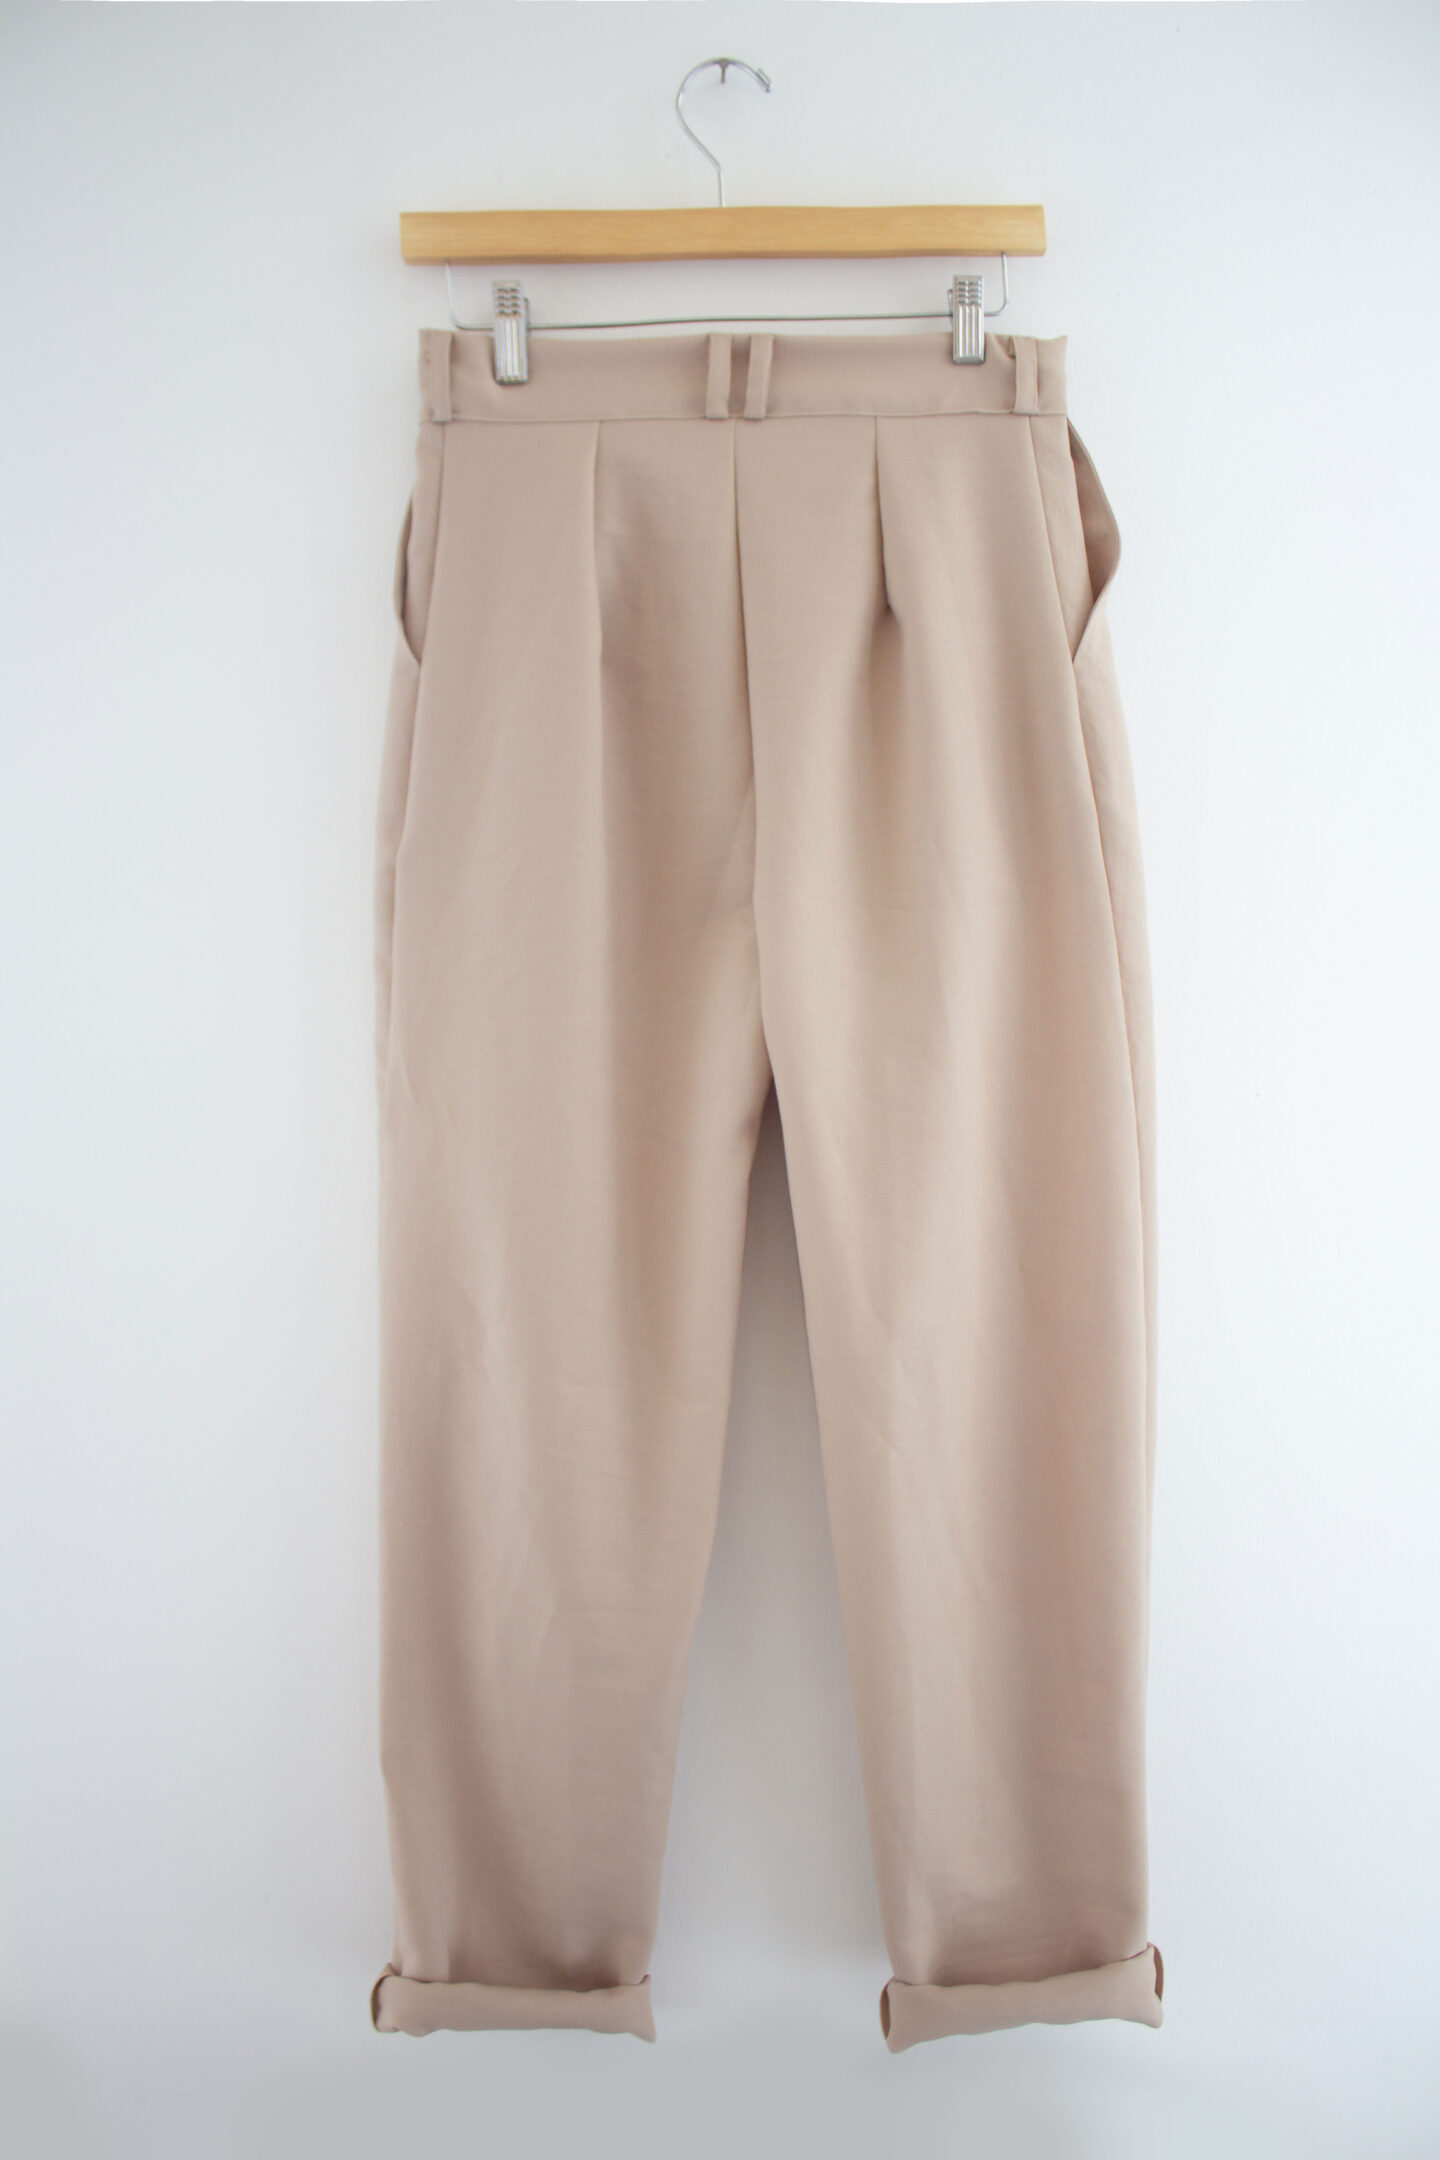
Stitch and overlock the back trouser pieces together.
Then pin, sew and overlock the inseam.
Next, we will finish off the trouser hems just by double folding the fabric by 1cm and topstitching. This is just a basic seam finish as we will double roll the hems.
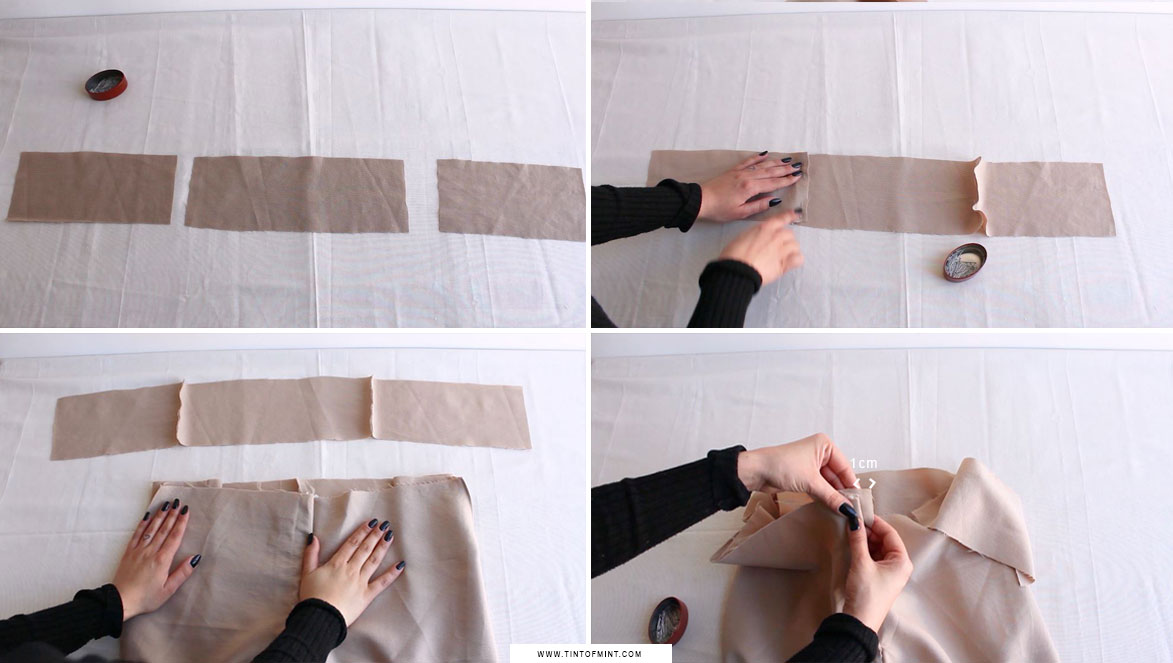
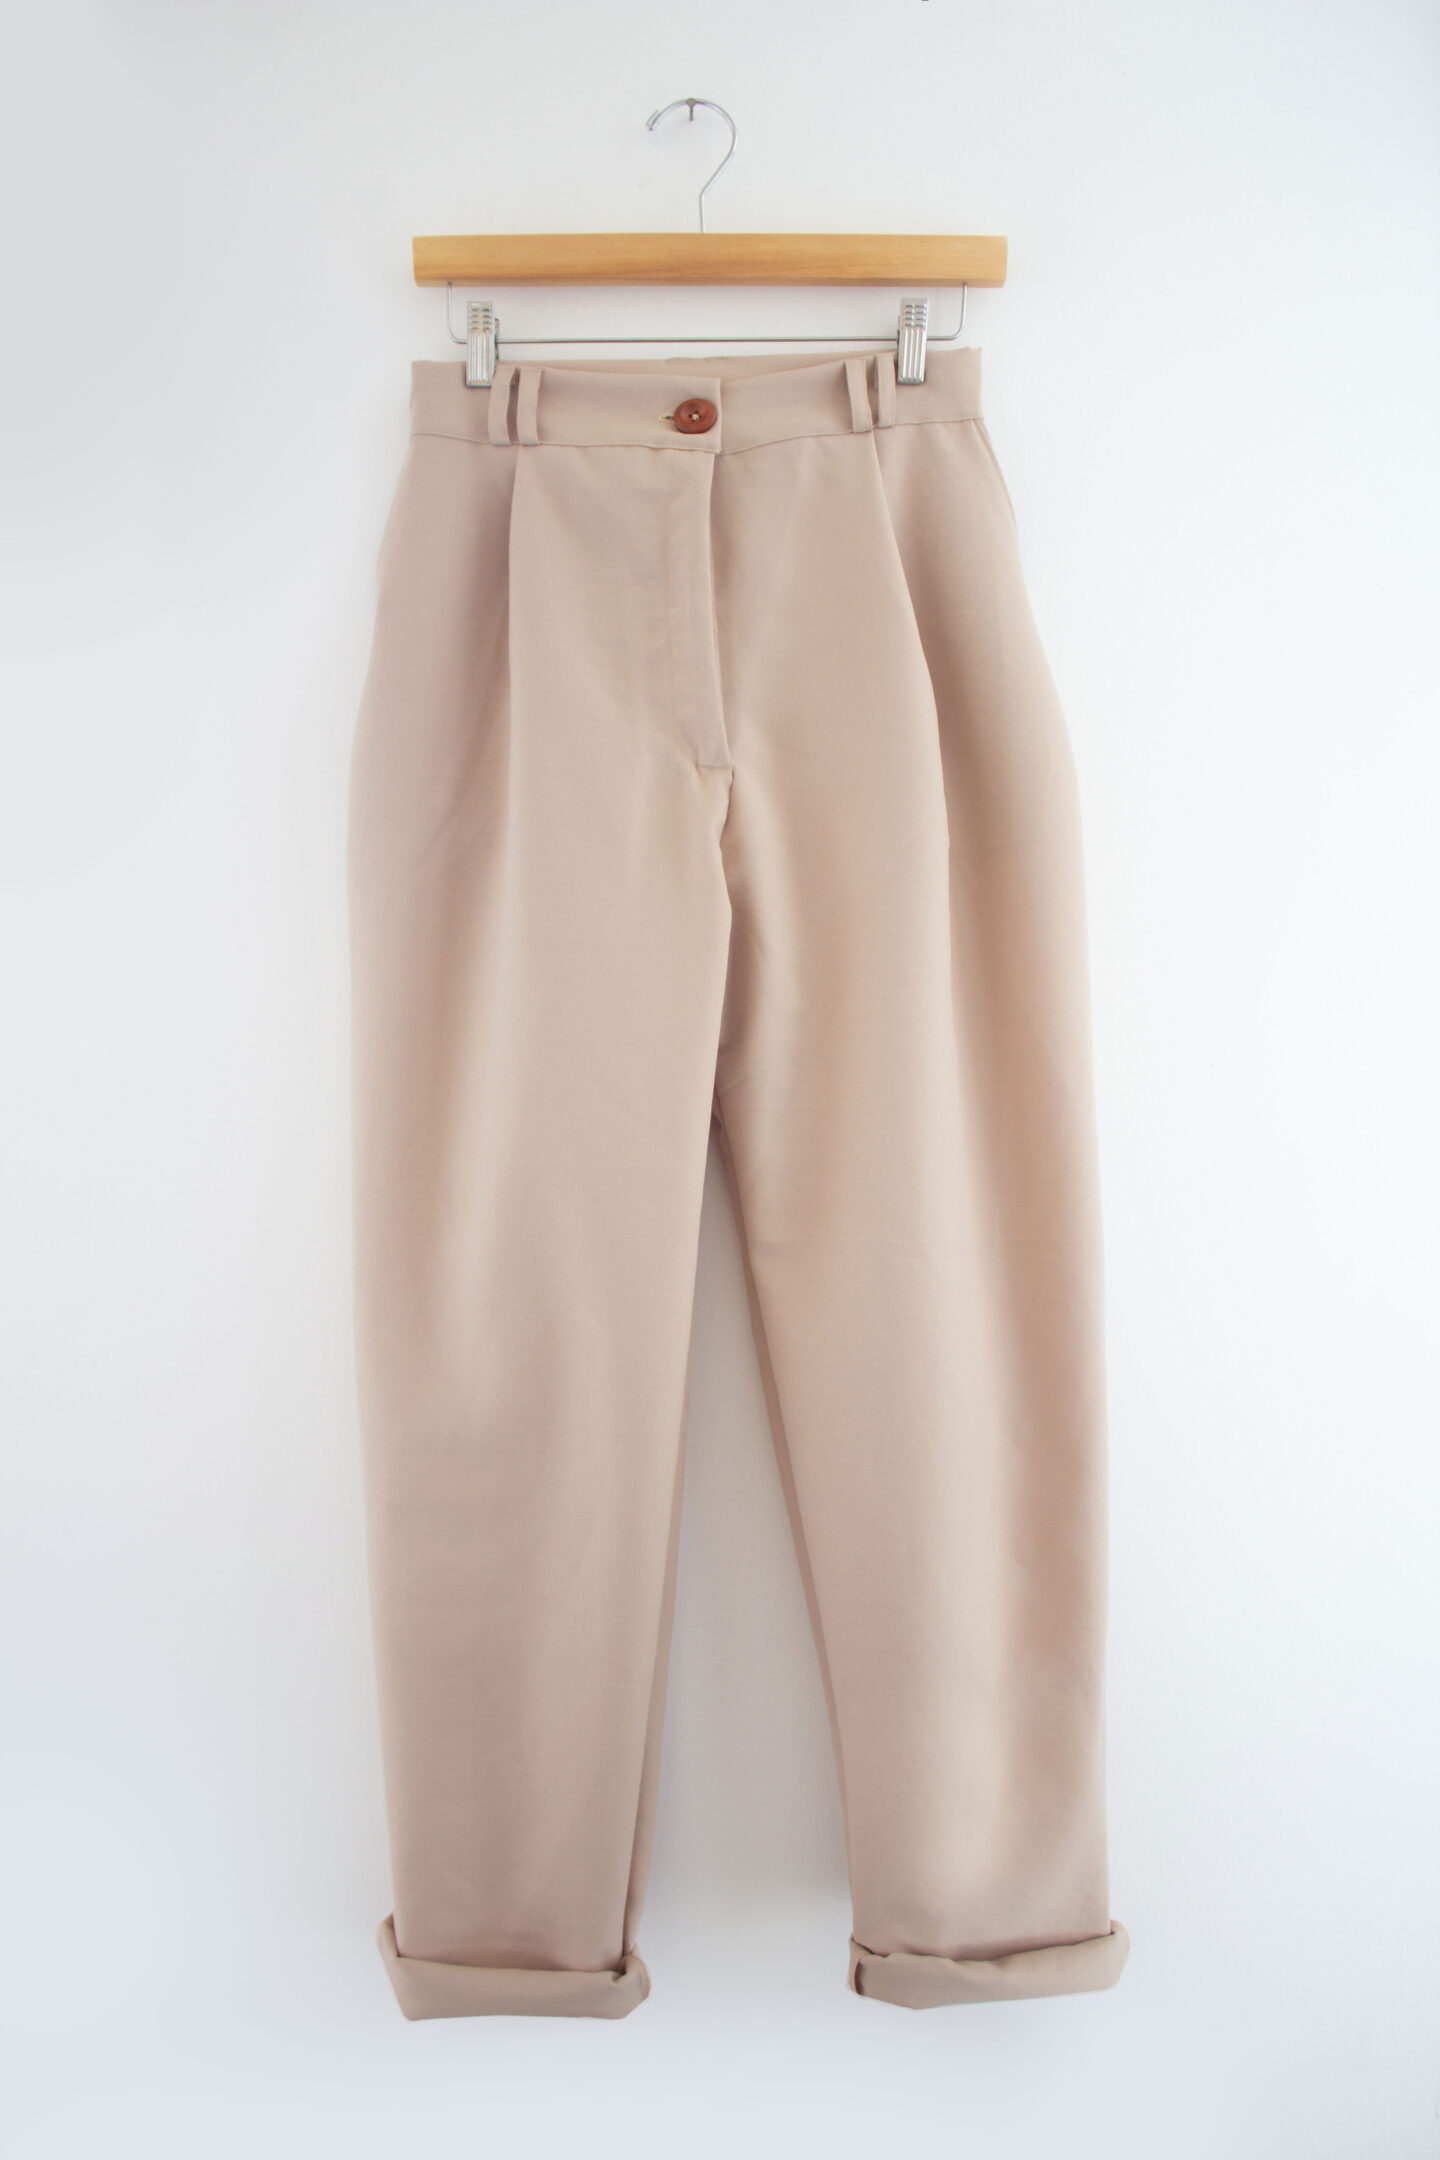
Now I’ve created a tutorial on how to adjust this pattern to your specific waist measurements which is super super easy to do and you can adjust those trousers to fit your specific measurements. Here is the link if you want to check it out CLICK. Now sew three pieces of the waistband together. Then attach the waistband to the trousers by pining side seams together first and then attach the waistband to the front and leave out extra 1cm and as the last step pin CB of the trousers to centre back of the waistband.
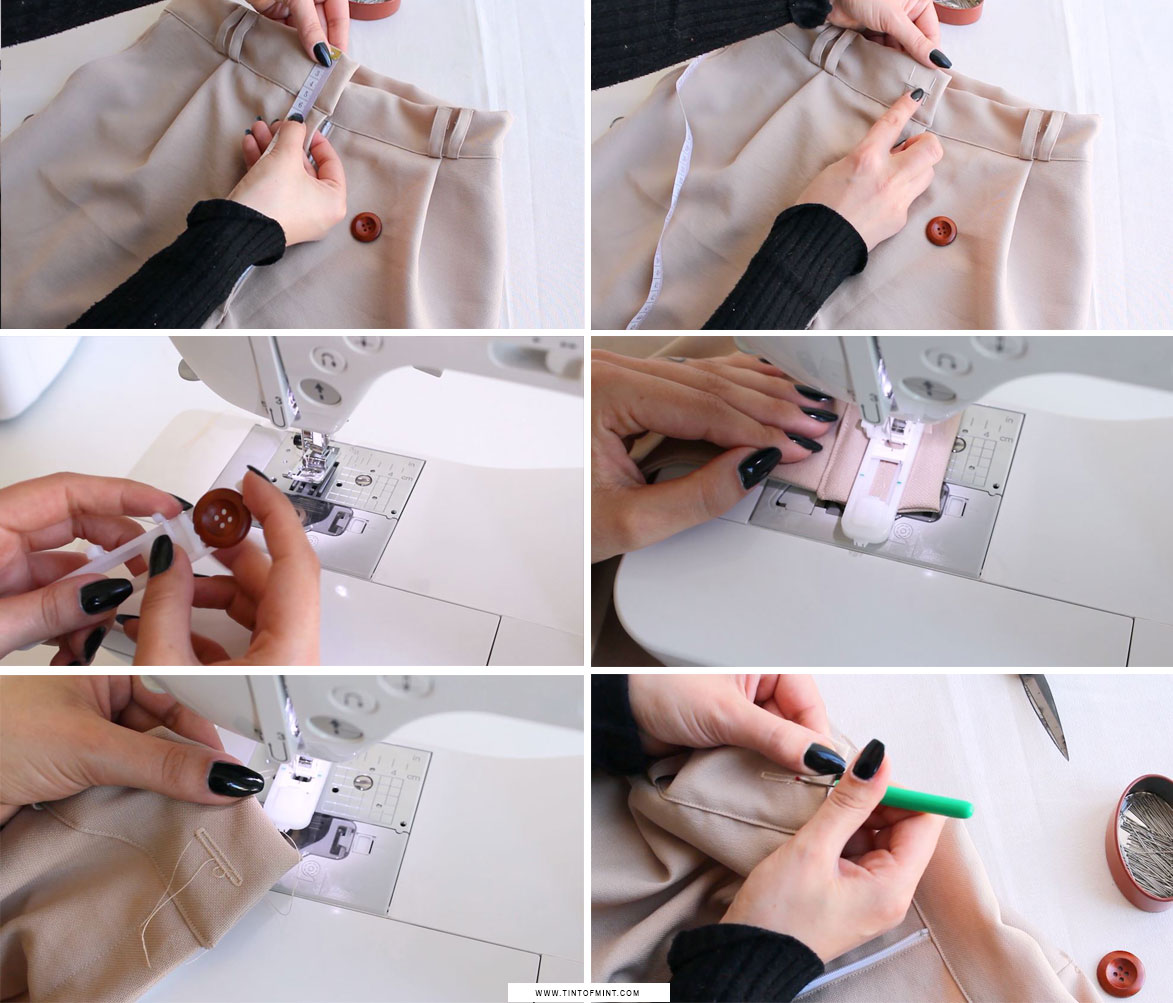
Then we need to create two darts at the back and two plates at the front. Create front pleats around 8cm away from the pocket by folding the excess fabric. Now the trousers front panel should match the length with the waistband front panel. Then make a back dart about 11cm long from the excess fabric using the same technique as with the front pleats. Sew the waistband all the way around.
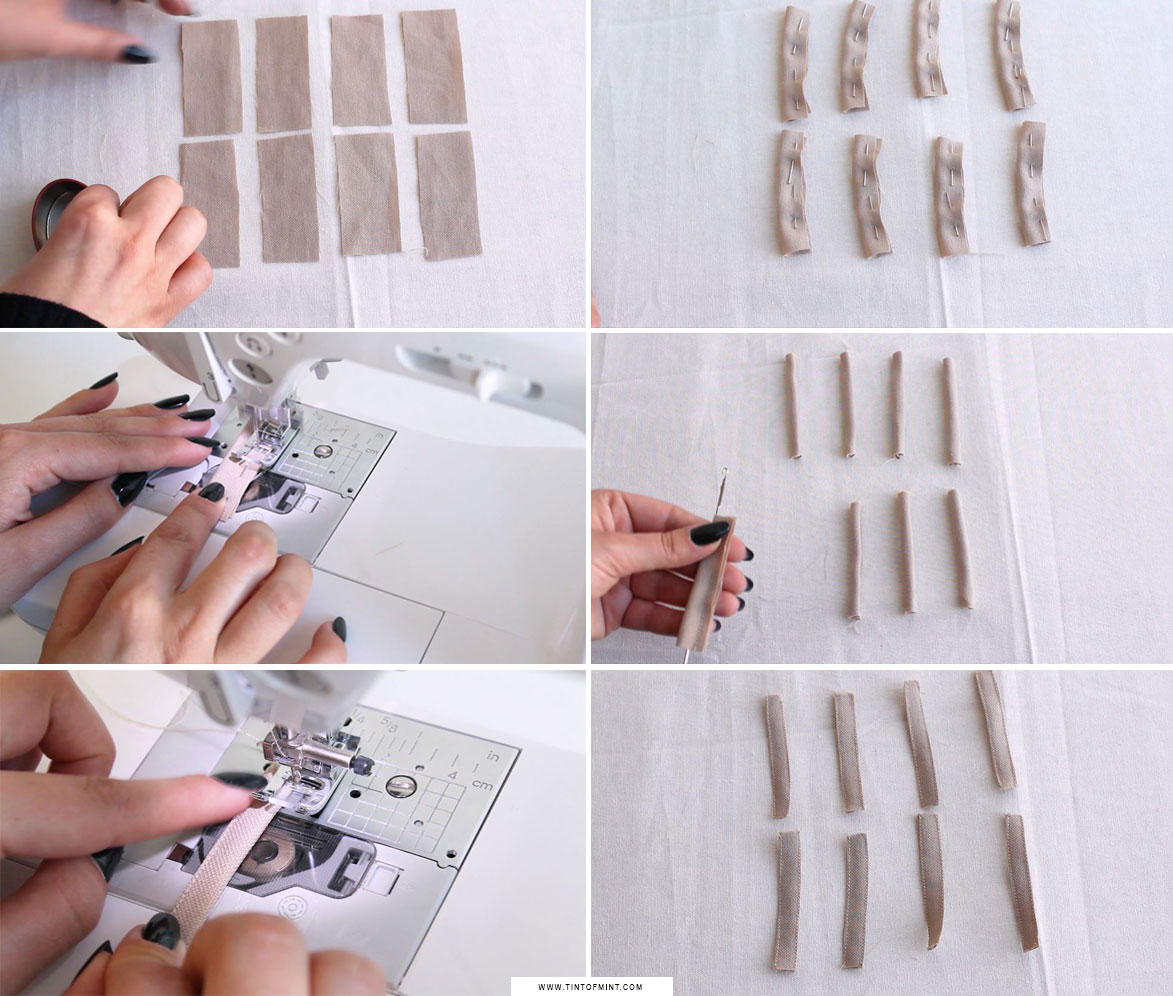
Next, we need to add belt loops before finishing the waistband. Take 8 belt loop pieces, fold them in half and pin them down. Then stitch so they are at least 1cm wide. Bag them out using a loop turner and topstitch both edges.
Now that the belt loops are ready we can add them to the trousers. I’ll add 2 belt loops on front left and right, two at the back and one on each side of the trousers.
Fold the waistband end in half, pin it down and make a straight stitch. Then bag out the corner and use scissors to make it nice and pointy. Then continue to fold the waistband inside by 1cm and pin it down as you go. Once you’re done topstitch the waistband carefully.
Fold the end of the belt loop by 1cm and stitch it to the top of the waistband.
Next, we need to make a buttonhole. The buttonhole should be 1cm away from the edge and exactly in the middle of the waistband. You can use pins or chalk to mark where it should be. Change to buttonhole foot, insert your button to the foot and make a buttonhole.
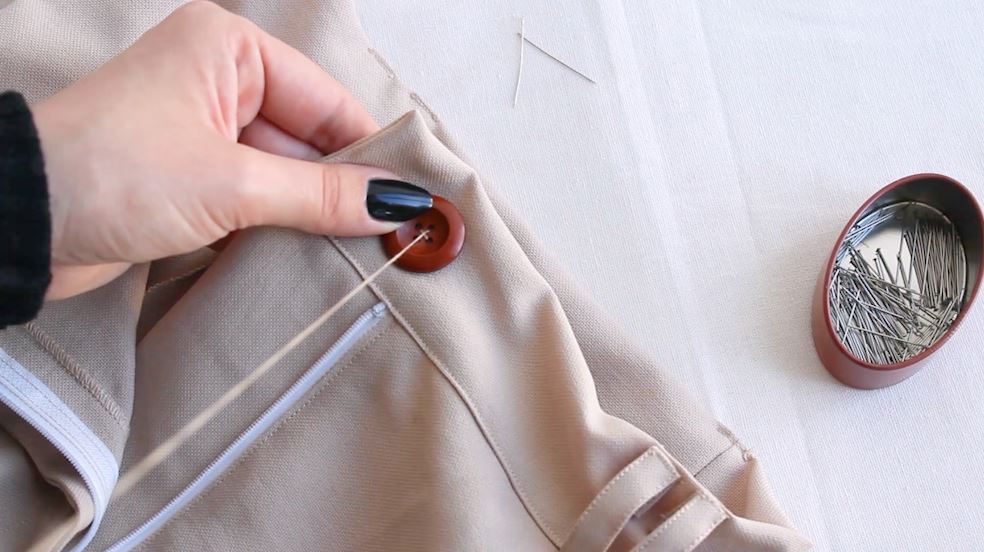
The last step is to add a button. With closed zip take a pin and put it through the centre of the buttonhole and that’s where your button should be. And that’s it! Your own perfect tailored trousers.