Welcome everyone to another DIY tutorial!
As spring greets us with beautiful weather, I decided it was the perfect time to make something new for my wardrobe. In this post, I’ll walk you through, step by step, how to sew this cami top and midi skirt co-ord set.
I chose to make a set instead of a dress because you can easily wear the pieces separately — giving you more outfit options and versatility. The best part? This is a super simple project that doesn’t require advanced sewing skills, so if you’re just starting out, this one’s definitely for you.

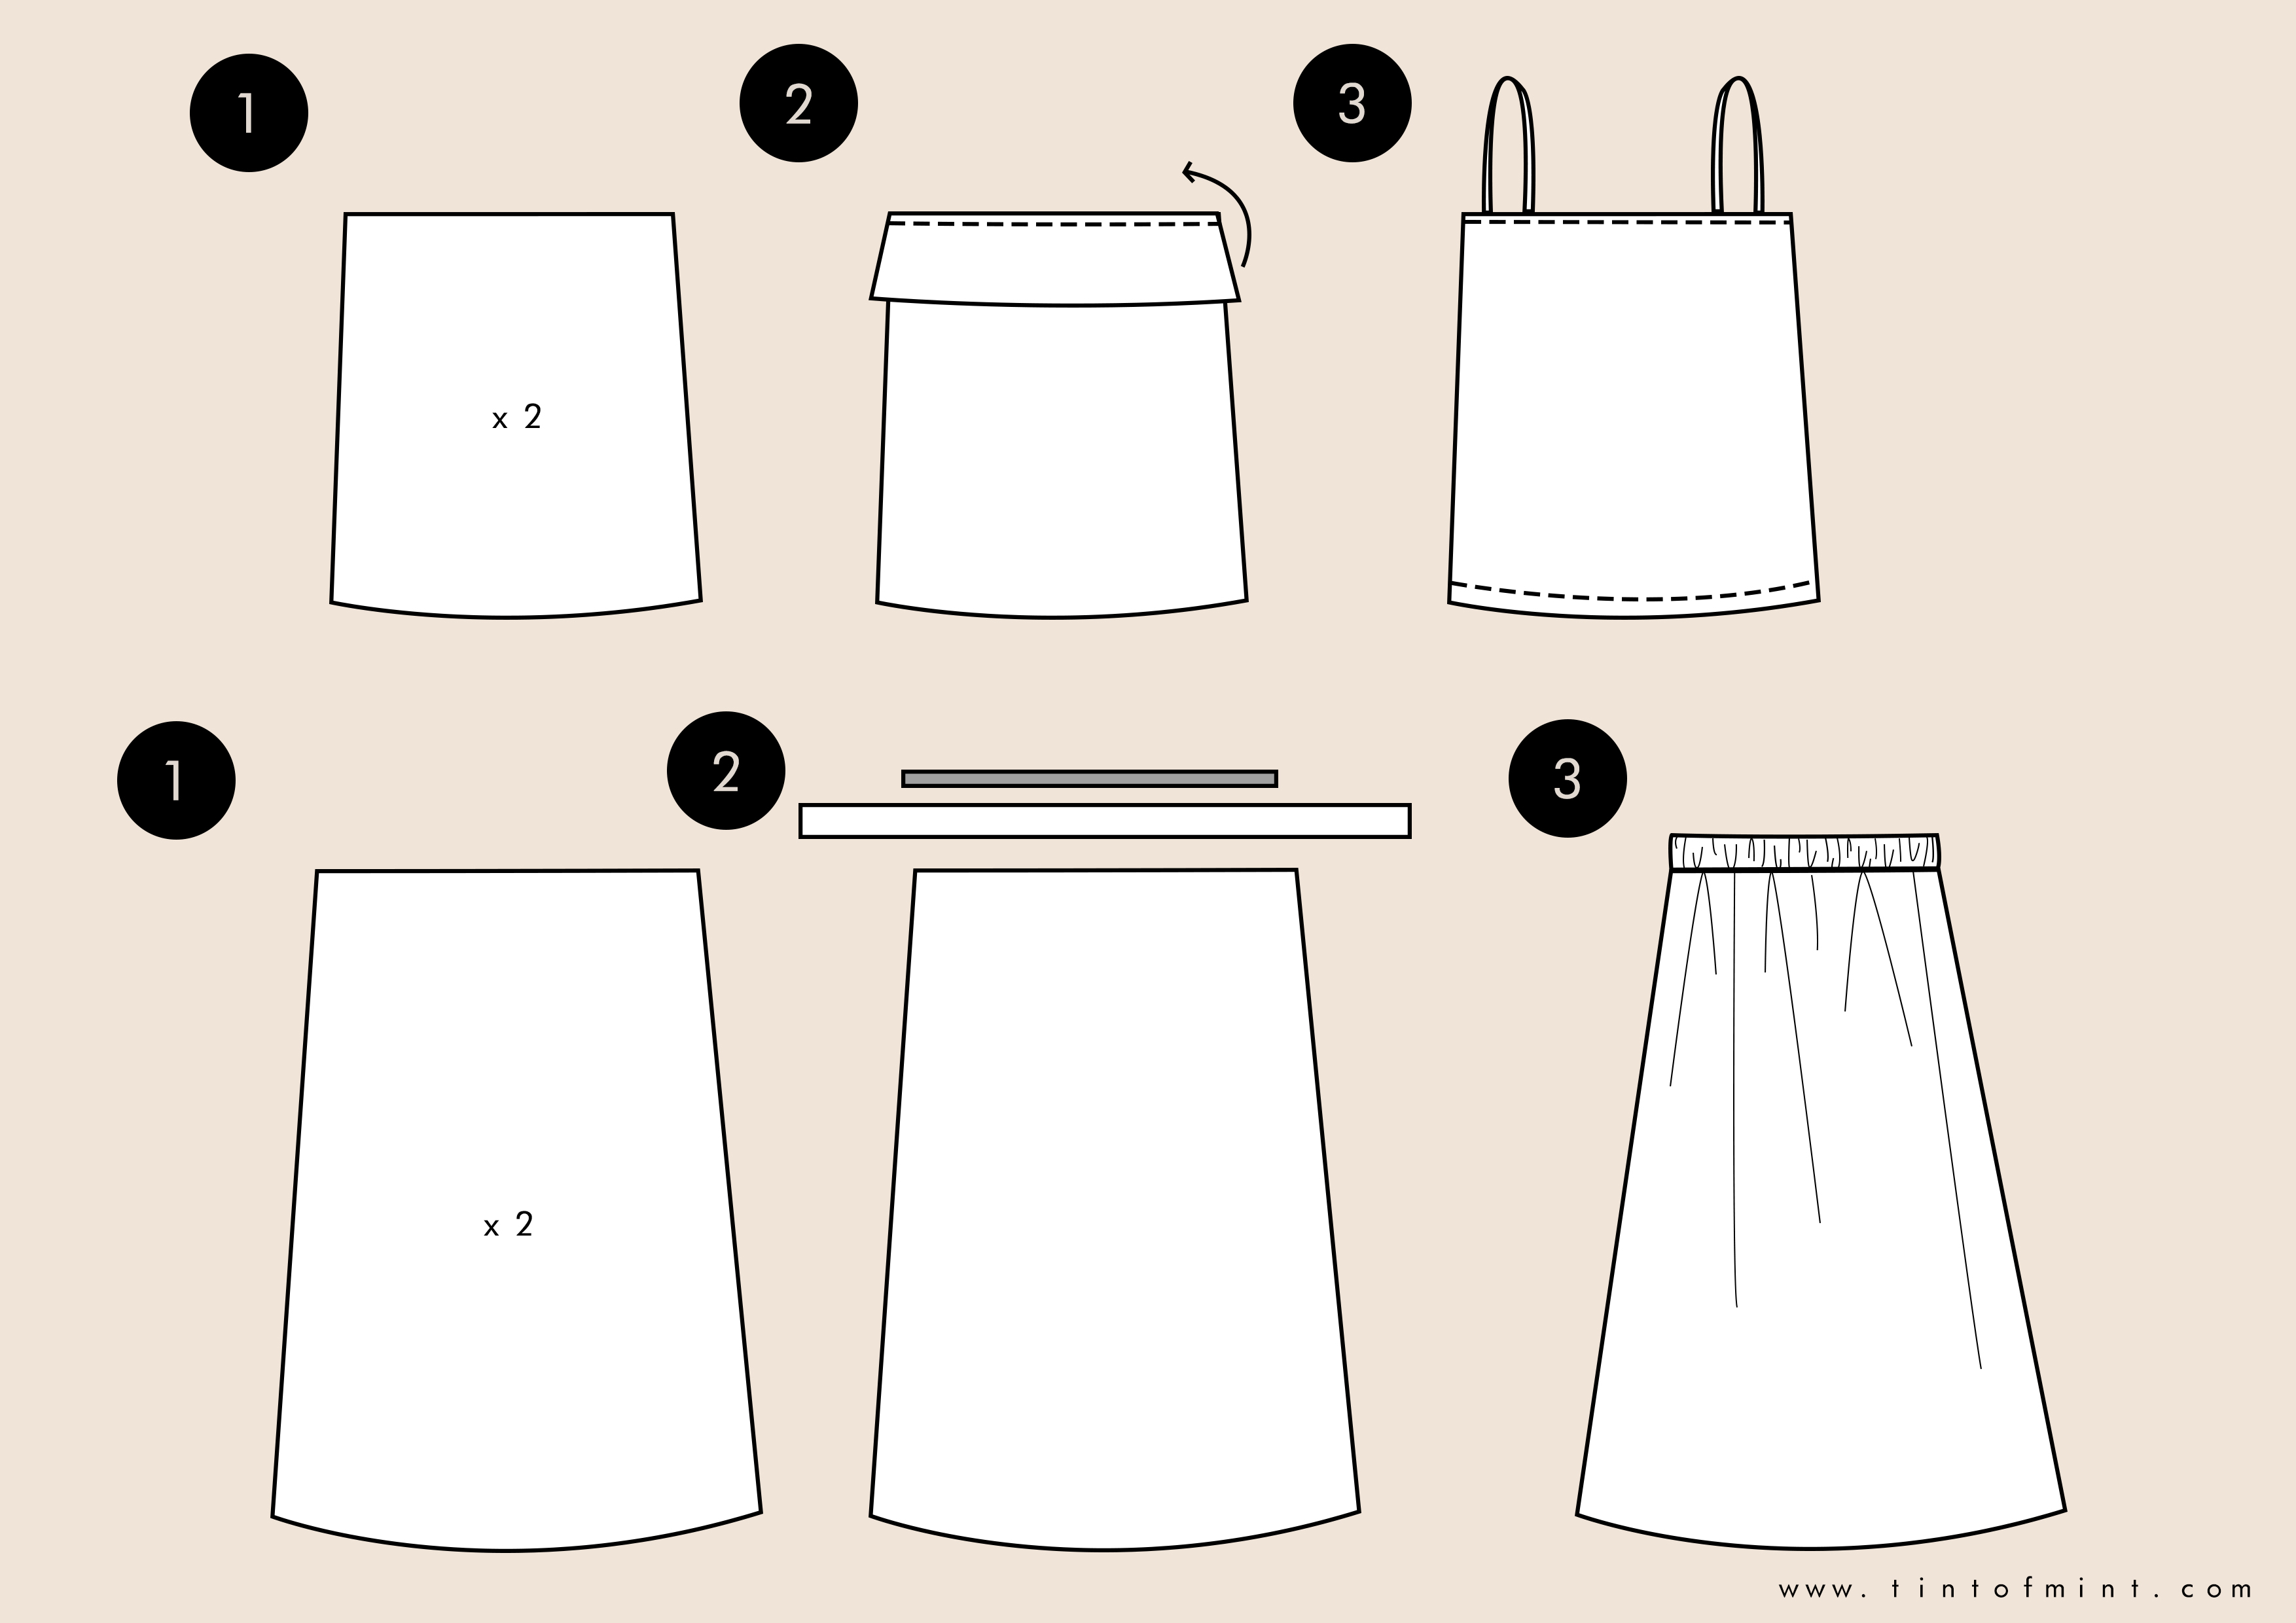
Step-by-Step Guide: How to Make the Cami Top
1. Cut two identical pieces from your chosen fabric and stitch the sides together. Overlock the side seam allowances and the hem. Then topstitch the hem with a 2 cm stitch line.
2. Cut out the facing using the same fabric (approximately 14 cm in length). Pin the cami straps in your desired position and stitch them together (right sides facing each other). Then turn the piece right side out (bag it out).
3. Finish by overlocking the hem and adding a neat topstitch.
Step-by-Step Guide: How to Make the Midi Skirt
1. Cut two identical pieces from your chosen fabric and stitch the sides together. Overlock the side seam allowances and the hem. Then topstitch the hem with a 2 cm stitch line.
2. Cut out one 8 cm high waistband from the same fabric. Attach the waistband to the skirt, starting from the inside and finishing on the outside with a topstitch. Leave around 6 cm open when topstitching the waistband.
3. Insert the elastic into the waistband through the opening, then close the 6 cm gap by continuing the topstitch.