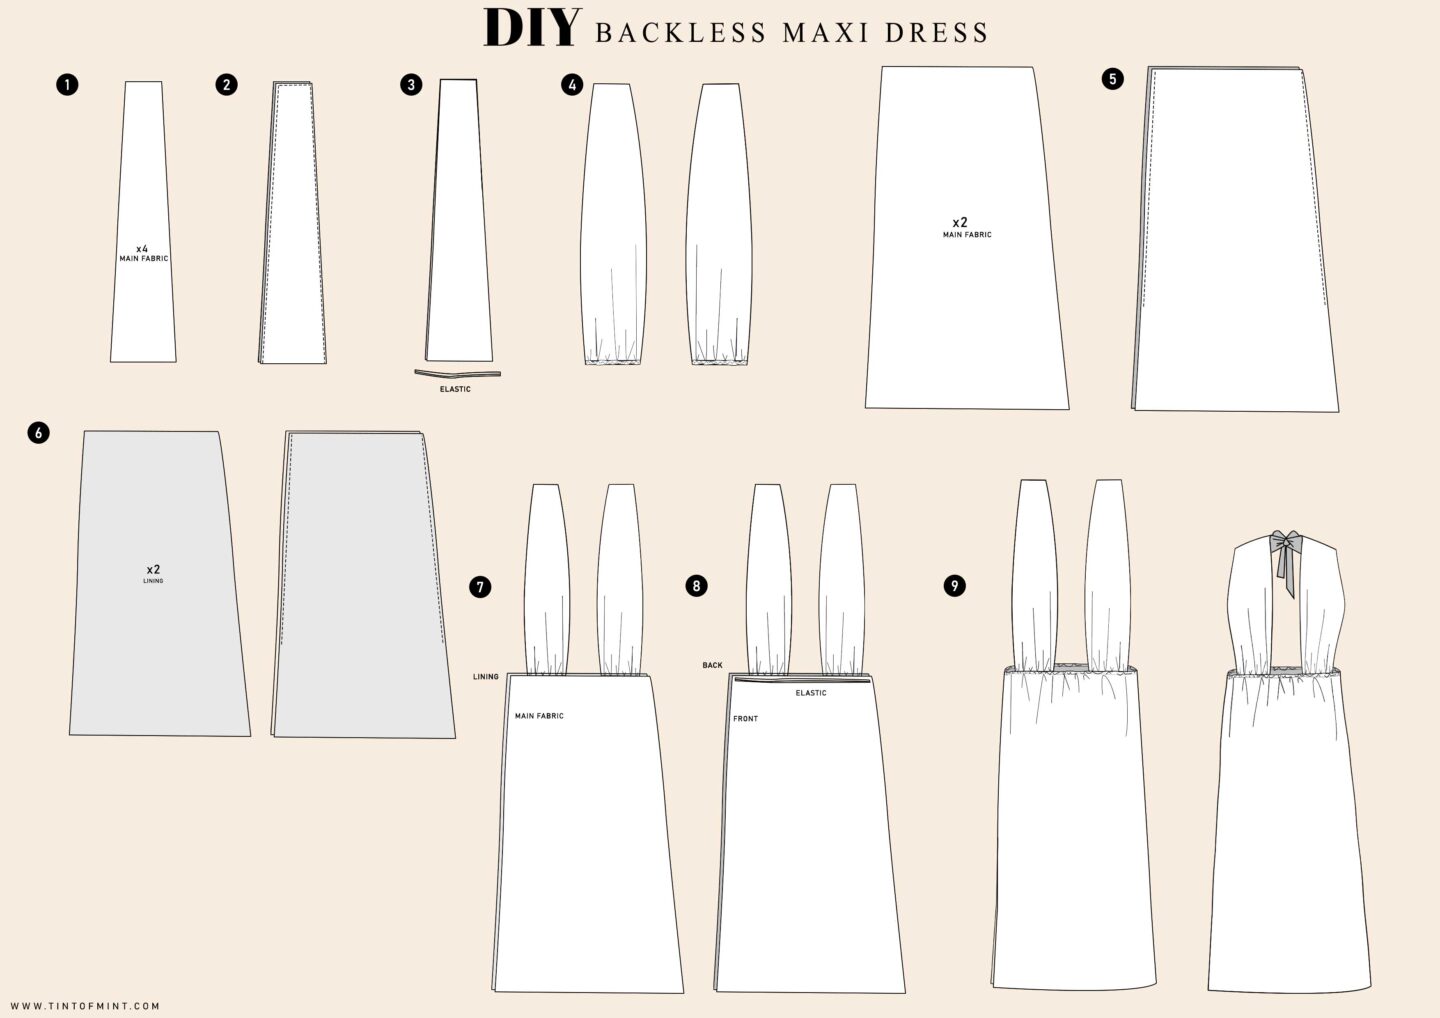
Cut the straps
Cut 4 wide strap pieces from your main fabric. These will serve as both straps and the lined front. Make each strap long enough to cover the bust and tie at the back.
Sew and turn the straps
Pair the strap pieces right sides together, stitch around, then turn right side out (bag out). Press flat. Repeat for the second strap.
Add elastic to strap bottoms
Attach a short piece of elastic to the bottom edge of each strap. It doesn’t need to be perfect because this area will sit between the skirt and its lining.
Prepare skirt and lining
Cut 2 skirt pieces in the main fabric and 2 matching pieces in lining. Overlock all raw edges, including the hems, for both main and lining.
Sew skirt side seams
Sew the side seams of the main skirt and the lining. Stop about 20 cm before the hem to create slits. If your fabric has stretch and you don’t want slits, sew all the way down.
Hem and finish slits
Topstitch the hems of both the lining and the main skirt. To finish the slits neatly, fold the slit edges in by 0.5 cm and topstitch. This is why you overlocked earlier.
Position the straps
With the skirt and lining still separate at the waist, insert the strap bottoms between the main skirt and the lining at the front waist. Pin in place where they feel supportive and balanced.
Join skirt to lining at the waist
Sew all the way around the waist to join the main skirt and lining, catching the strap bottoms securely in the seam.
Add the elastic waistband
From the inside, sew the waistband elastic to the seam allowance at the waist. If you prefer, create a casing and feed the elastic through. Finish by topstitching the waistband from the right side while gently stretching the elastic so the stitches distribute evenly.